Big week at our house. Replacing all our roofing with standing seam metal roofing. But first we have to straighten the roof on our garage. Here is what it looked like before work started yesterday (Sammy helped)...
Showing posts with label house. Show all posts
Showing posts with label house. Show all posts
Tuesday, September 28, 2010
Saturday, July 04, 2009
Current Requirements for Bathroom Remodel..
Paul has reformatted his "requirements" document (click here to see it) for the bathroom remodel we hope to do this year (before inflation kicks in). Please feel free to pass on to us suggestions such as for tile, fixtures, etc. We want to stay consistent with the era of the house and the other bathrooms.

It's not pink, it's salmon!


Saturday, January 03, 2009
You get what you pay for...
Paul thought he would try and save some money replacing our heater's Aprilaire humidifier pad himself. He went down to Lowes and bought an aftermarket the pad.
Suddenly our humidifier started leaking water.
After the heating serviceman came twice, we figured out that the replacement pad was slightly thinner (as seen below) than the original manufacturer pad. The serviceman speculated that the thinness allowed the pad to flex when our heater's fan goes into a burst mode (if after running for 10 minutes the fan kicks on high if the desired temperature is not reached) thus causing it to leak. Putting in the original Aprilaire pad fixed the problem. The cost to figure it out? Don't ask Paul...he's still a little tender on that.

Suddenly our humidifier started leaking water.
After the heating serviceman came twice, we figured out that the replacement pad was slightly thinner (as seen below) than the original manufacturer pad. The serviceman speculated that the thinness allowed the pad to flex when our heater's fan goes into a burst mode (if after running for 10 minutes the fan kicks on high if the desired temperature is not reached) thus causing it to leak. Putting in the original Aprilaire pad fixed the problem. The cost to figure it out? Don't ask Paul...he's still a little tender on that.
The original manufacturer pad on the left...
...is about 1/4 thicker than the one Paul bought on the right...
...is about 1/4 thicker than the one Paul bought on the right...

Sunday, June 01, 2008
Decked...
Our cedar deck has been showing its age. So we decided to try fixing some boards and freshen it up. We decided to go with SealMaxx. They came a couple of weeks ago to power wash the deck. In a few weeks they'll be back to apply the stain. We'll see over time if it was a wise decision. We'll put some photos on when the work is complete.


It looks like a contraption made by Wile E. Coyote...

Uh-huh...

Sunday, April 20, 2008
Closing one door, opening another...
Having been in our house for ten years, we figure it's time to change our front door. The picture below sums it up pretty sadly, it's a 1959 door that is painted and (as you get ever closer) ugly. When we did our kitchen remodel, we replaced our side and rear doors with fiberglass ones and were pretty happy with them.
So we are thinking of replacing our front door with a Thermatru American Style Collection door with the natural oak stain on the exterior (and painted white on the interior since our interior trim is white). We won't get the optional dentil shelf since it won't go with the style of our house. And the glass would be clear (again because we don't want it to be too missionary).
Any thoughts out there? Do you think this would look bad? Should we make the exterior of the door white? We don't plan on putting on a storm door-- do you think we should? Do you think we should paint white the trim around the exterior of our front door?


So we are thinking of replacing our front door with a Thermatru American Style Collection door with the natural oak stain on the exterior (and painted white on the interior since our interior trim is white). We won't get the optional dentil shelf since it won't go with the style of our house. And the glass would be clear (again because we don't want it to be too missionary).
Any thoughts out there? Do you think this would look bad? Should we make the exterior of the door white? We don't plan on putting on a storm door-- do you think we should? Do you think we should paint white the trim around the exterior of our front door?
Our house with our ugly front door...

Here is what the Thermatru door would look like...
...clear glass...
...and natural oak stain on the exterior...
...clear glass...
...and natural oak stain on the exterior...

A man with a plan...
Back in 2003 we had a local landscape architect draw up some plans for our small front yard. A year later we actually implemented it using a local nursery. The landscape architect is a bit of a character. He gave us the plan but never wrote down the plant types. (He told us we would receive them by mail, but we never did...perhaps because we didn't go with his friend's nursery). In the end, we chose a local nursery and the guy took his best shot at the plant types.
The landscape architect made a big deal when he presented the plans of giving all the plant names in their Latin terms (perhaps to impress us). When he finished, he paused...presumably it was his hint we were supposed to hoist him on our shoulders and carry him around our living room chanting his name. We actually liked his plan, though Paul couldn't help but needle him just a little bit. What follows is pretty much part of that conversation...

The landscape architect made a big deal when he presented the plans of giving all the plant names in their Latin terms (perhaps to impress us). When he finished, he paused...presumably it was his hint we were supposed to hoist him on our shoulders and carry him around our living room chanting his name. We actually liked his plan, though Paul couldn't help but needle him just a little bit. What follows is pretty much part of that conversation...
ARCHITECT: ...arborvitae , tilia cordata, quomodo invidiosulus nomine grinchus Christi natale abrogaverit, ex nihilo, reductio ad absurdum...
(Long pause as he waits for praise)
ARCHITECT: Well, what do you think?
PAUL: Well, it seems fine and all...but...
ARCHITECT: Fine? Is something wrong?
PAUL: Well, it is missing something...
ARCHITECT: What?
PAUL: Well, it's missing something right out in the front by the street.
ARCHITECT: What?!?!
PAUL: One of those little jockey statues holding a lantern.
(At this moment the architect tries to swallow but can't. His face gets red. He stops breathing)
MICHELE: Stop that Paul! (to architect) He's just kidding!
(architect starts to breath again)
The original plan with plant types written in by local nursery guy...
...rain spots were acquired when local nursery guy left plan out in rain...
...rain spots were acquired when local nursery guy left plan out in rain...

Friday, September 14, 2007
Sometimes it pays to be paranoid...
Recently Southeast Minnesota received a lot of rain. A lot. In about 24 hours our part of town received 11.5"...no kidding. We noticed that some home owners down the street put sheets of plywood over their basement egress window openings.
How did our basement fare with the two sizable basement egress windows in the front?
In our original posting on our basement remodel, we didn't mention everything that happened during construction. So now for the rest of the story...
Paul is a bit of a worrier. Or you could say he has a heightened sense of concern. One night during the construction he had a dream that his neighbors burned him in effigy (really) over poor construction of the egress windows (in the dream). When he woke up, he began to think about water displacement...
To illustrate his thoughts, look at the following pictures and captions...
An exterior view of a Bilco ScapeWEL...How did our basement fare with the two sizable basement egress windows in the front?
In our original posting on our basement remodel, we didn't mention everything that happened during construction. So now for the rest of the story...
Paul is a bit of a worrier. Or you could say he has a heightened sense of concern. One night during the construction he had a dream that his neighbors burned him in effigy (really) over poor construction of the egress windows (in the dream). When he woke up, he began to think about water displacement...
To illustrate his thoughts, look at the following pictures and captions...
...note that the rain would just pour in...

There is an optional Bilco clear cover...
...which we chose...
...but note that any water displaced will drop immediately over the sides...
...so is that still a problem?...yes...
...which we chose...
...but note that any water displaced will drop immediately over the sides...
...so is that still a problem?...yes...

Because when installing the ScapeWEL...
...you have to dig a large(r) opening...
...as with putting in any egress...
...but...
...Bilco has some very specific instructions regarding backfill...
...you have to dig a large(r) opening...
...as with putting in any egress...
...but...
...Bilco has some very specific instructions regarding backfill...

From the ScapeWEL installation manual:
STEP 6 Backfilling:
If sandy soil exists, line the opening with a permanent barrier (such as house wrap) to restrict sand from washing into rock. FAILURE TO PROPERLY BACKFILL WILL VOID WARRANTY
OUTSIDE of Well: Backfill evenly by hand on all sides as the hole is filled in; Do not do one side at a time. Always use 3/4” clean free-draining rock or A6 stone completely around the well at least 12” in width to isolate the well from the earth. Fill area to within 4” of top step panel. This will keep window well movement to a minimum during cold weather freeze/thaw conditions and settling soil. Do not use expansive soils, frozen soils, material that has debris, or organic material.
What this all meant was that any water displaced over the Bilco covers we bought would just drop over the side onto the gravel and again go right into the bottom of the egress opening. If we were ever to get 6" or more of rain in a short period of time, that could cause an accumulation in our window well. Our 1960 house does not have exterior drain tile. So what to do?
Paul went to the general contractor and told him about his dream and that we had to change our design...to use those fugly stainless steel corrugated window wells (since you don't have to backfill them with gravel...and thus the displaced water would not be a problem). We would eat the cost of the already purchased Bilco materials to prevent a future catastrophe. The general contractor took it in stride (and ignored the opportunity to play Sigmund Freud to Paul's dreams). He said let's first look at all the options. So we took to thinking and came up with a plan.
What we ended up doing is laying 6" under the ground rubber roofing material (for flat roofs) over the ground at a slope away from the house. The roofing material was cut around the Bilco ScapeWELs so that any water displaced over the sides would hit the ground (6") of it, saturate it quite quickly and cause any more to wash off the ground (at a slope) away from the house. Further more, we also lined the vertical sides of between the backfill and the earth to prevent water from seeping in along the sides.
Until this year we had no problems.
When the 11.5" of rain came this year...we still had no problems.
Sometimes it pays to be paranoid.
Thursday, September 13, 2007
Kitchen Remodel: New Side Door For Kitchen
Today our kitchen remodel progressed. The drywall guy started doing his stuff (whatever that is) and the general contractor replaced our side kitchen door.
Previously we had changed all our flat, hollow-core interior doors on the first floor with 6-panel solid wood doors (which someday Paul has to paint white to match the trim...but that is a completely different story). We replaced the original exterior wood door from our house with a fiberglass door (that matched the 6-panel doors on the bottom). We chose fiberglass over steel because the lumberyard guy said that steel doors would be more likely to dent than fiberglass. We will also be replacing the exterior door to our four season porch, we'll post on that when the time comes.


Exterior view...
...it's just primed...still needs to be painted...
....and some exterior trimming still needed...

Previously we had changed all our flat, hollow-core interior doors on the first floor with 6-panel solid wood doors (which someday Paul has to paint white to match the trim...but that is a completely different story). We replaced the original exterior wood door from our house with a fiberglass door (that matched the 6-panel doors on the bottom). We chose fiberglass over steel because the lumberyard guy said that steel doors would be more likely to dent than fiberglass. We will also be replacing the exterior door to our four season porch, we'll post on that when the time comes.
Goodbye old door...

Our contractor recommended Wausau Taylor doors...
...we hope it works out for us...
...we hope it works out for us...

Inside view...
...not trimmed yet...
...not trimmed yet...

Exterior view...
...it's just primed...still needs to be painted...
....and some exterior trimming still needed...

Monday, September 10, 2007
Kitchen Remodel: Final Choices in "Textures"...
The next step in our kitchen remodel is to put in the drywall. But while we wait on that, here's the (almost) final "textures" that will be going into our kitchen...


The cabinet wood will be quartersawn red oak...
...with a natural finish...
...with a natural finish...


Our faucet will be most likely be...
...the Kohler Essex in brushed nickel...
...the Kohler Essex in brushed nickel...

Bucking the granite counter top crowd...
...we are going with Corian Abalone...
...we are going with Corian Abalone...

Our corian sink will be bisque in color...
...the 902 model...
...the 902 model...

Our tile will be 3"x6" bisque subway tiles...
...with an accent line of two 1" high rows of glass tiles...
...here's an approximation with the Northstar Ceramics White Blend11T...
...with an accent line of two 1" high rows of glass tiles...
...here's an approximation with the Northstar Ceramics White Blend11T...

Wednesday, September 05, 2007
Paulie's Wedding: Back in Rome, NY
A few years ago Paul's parents sold the house they lived in for almost 40 years and moved out of state. Some fellow bought the house, gutted it, upgraded it, and flipped it. Earlier this year Michele was able to walk through the house, but this was the first time Paul was able to view it in person (from the outside) when we went home for Sammy's Uncle Paulie's wedding. Here are some photos of the front of the house:


New siding, new roof, new windows, new shutters, new front door...

The giant two pin oaks that Paul's father hand planted over 30 years ago...
...Paul remembers when they were just a few inches in diameter...
...Paul remembers when they were just a few inches in diameter...

Thursday, August 30, 2007
Kitchen Remodel: Where to Stop?!?
The tile subcontractor comes over to do some final measurements and stuff. Paul starts talking to him, and gets the idea that maybe we should re-tile the bathroom floor which goes into the entryway which goes into the kitchen. Then it's like, let's pull the tile off the walls to match the tile on the back-splash. Yikes. That would be an additional $2,000. Maybe we should wait on that. So we decided to tell the tiler to buy enough tile to tile the bathroom too, but we'll just keep it in a box for the future (so it will match).
But then we started thinking, if we were to spend additional money what would we spend it on? Probably the better question is where do we stop spending more money?
Our kitchen is very small...roughly 12'x12'. With the remodel, we won't have any place to put a little table even...meaning we use our dining room full time. So we're very concerned about how things seem to flow in the kitchen, visually as well as work-wise.
One thing that really bothers us is our Kitchen Aid refrigerator. Bought in 2003, it is a huge 33" by 33". OK, not so huge, but the wall of cabinets (see bottom of diagram below in the somewhat outdated remodel plan) comes out 24" from the wall, but to accommodate the refrigerator in the middle cabinet, the cabinet legs have to jut out like 6" further. Ick. So on the way home from work Paul stopped at an appliance store and they had a cabinet-depth (24") Kitchen Aid on sale for a very good price. So we took the plunge and bought it. That will allow us to have the cabinets on that wall all be a uniform depth of 24". Anyone want to buy our old refrigerator? (It won't make it down the stairs to the basement, so we can't keep it!)


But then we started thinking, if we were to spend additional money what would we spend it on? Probably the better question is where do we stop spending more money?
Our kitchen is very small...roughly 12'x12'. With the remodel, we won't have any place to put a little table even...meaning we use our dining room full time. So we're very concerned about how things seem to flow in the kitchen, visually as well as work-wise.
One thing that really bothers us is our Kitchen Aid refrigerator. Bought in 2003, it is a huge 33" by 33". OK, not so huge, but the wall of cabinets (see bottom of diagram below in the somewhat outdated remodel plan) comes out 24" from the wall, but to accommodate the refrigerator in the middle cabinet, the cabinet legs have to jut out like 6" further. Ick. So on the way home from work Paul stopped at an appliance store and they had a cabinet-depth (24") Kitchen Aid on sale for a very good price. So we took the plunge and bought it. That will allow us to have the cabinets on that wall all be a uniform depth of 24". Anyone want to buy our old refrigerator? (It won't make it down the stairs to the basement, so we can't keep it!)
You can see the bulge below...
...the new refrigerator will get rid of it...
...was it worth the money?
...the new refrigerator will get rid of it...
...was it worth the money?

Here is our current refrigerator...
...its major fault is that it is not cabinet depth...
...its major fault is that it is not cabinet depth...

This is what our new refrigerator will look like...
...we would have preferred to get a cabinet-depth with the freezer on the bottom...
...but we got a really, really good deal...
...we would have preferred to get a cabinet-depth with the freezer on the bottom...
...but we got a really, really good deal...

Kitchen Remodel: The Tear-out
Here are the tear-out photos of the kitchen this week. The general contractor made it look easy, but there's no way we could have done it so quickly. The only mishap so far was when the contractor was tearing out the sink cabinet, he hit a copper pipe and broke it. A water geyser was going from the floor to the ceiling. Luckily the basement directly underneath is unfinished. So far we are happy with the general contractor. We hope it continues that way.
A big mystery was solved. For years Paul railed about a leak he thought he could hear in the walls. Michele never heard it. But Paul was certain that it was there. He agonized with fears of toxic mold growing in the ceiling of the kitchen (underneath the bathrooms above). So we had the contractor open up the ceiling to check the plumbing. It was in perfect condition. The dripping Paul heard was expansion of the pipes when hot water first passed through them. The plumber will anchor the pipes better to cut down on the noise.
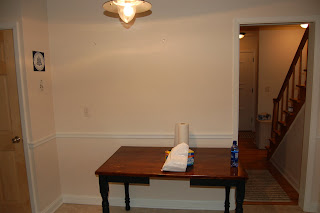
The biggest change will be opening up a portion of the wall between the kitchen and dining room. See the before and after photo below...
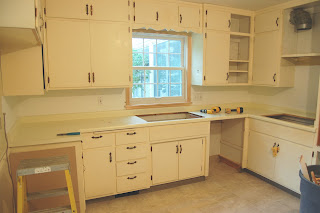
The remains of our cabinets...
...headed for the landfill or whatever...
...notice the stainless sink that Paul's father installed for us at the bottom...


A big mystery was solved. For years Paul railed about a leak he thought he could hear in the walls. Michele never heard it. But Paul was certain that it was there. He agonized with fears of toxic mold growing in the ceiling of the kitchen (underneath the bathrooms above). So we had the contractor open up the ceiling to check the plumbing. It was in perfect condition. The dripping Paul heard was expansion of the pipes when hot water first passed through them. The plumber will anchor the pipes better to cut down on the noise.
The biggest change will be opening up a portion of the wall between the kitchen and dining room. See the before and after photo below...
The kitchen sans the stainless appliances...
...which are currently stored in our living room...
...which are currently stored in our living room...

The remains of our cabinets...
...headed for the landfill or whatever...
...notice the stainless sink that Paul's father installed for us at the bottom...

Our kitchen sans the cabinets...
...see the two copper pipes coming up beneath the window?
The pipes there before were replaced after the contractor broke one...
...we wonder if we will have to pay for the emergency plumber visit...
...see the two copper pipes coming up beneath the window?
The pipes there before were replaced after the contractor broke one...
...we wonder if we will have to pay for the emergency plumber visit...

A key reason to do the full remodel...
...was so Paul could get peace of mind...
...to know there were no leaks or mold in the ceiling...
...as the bank robber said in "Dirty Harry"...
"I gots to know"
...was so Paul could get peace of mind...
...to know there were no leaks or mold in the ceiling...
...as the bank robber said in "Dirty Harry"...
"I gots to know"

The general contractor put up some poles to hold a tarp...
...this is before they cut the opening on the wall...
...between the dining room and kitchen...
...Paul put a garbage bag over the chandelier...
...note how the chairs are arranged...
...this is before they cut the opening on the wall...
...between the dining room and kitchen...
...Paul put a garbage bag over the chandelier...
...note how the chairs are arranged...

Here's the key remodel change...
...note the wall, the sliding pocket door...
...and the pantry closet on the right...
...note the wall, the sliding pocket door...
...and the pantry closet on the right...

There it is...
...the opening is wider...
...and the pantry is gone...
...the opening is wider...
...and the pantry is gone...

Kitchen Remodel: "Before" Pictures
This week demolition started on our kitchen as the remodel kicked into high gear. The main feature of our remodel is to open the wall between the kitchen and the dining room. This blog entry will show what we started with.



Our first floor layout...

Years Ago...
The kitchen right before we bought the house...
...notice the lovely wallpaper, light on the right, and bisque appliances...
...and *NO* dishwasher!
...notice the lovely wallpaper, light on the right, and bisque appliances...
...and *NO* dishwasher!

Again the kitchen right before we bought the house...
...notices the sink...
...Paul's father put in a stainless one later on...
...notices the sink...
...Paul's father put in a stainless one later on...

Present Day
The kitchen right before the demo started...
...through the left door is the living room...
...through the left door is the living room...

Here's the refrigerator that we bought that resulted in us getting all stainless appliances..
...note the new window...
...note the new window...

More stainless appliances...
...they are often victimized by Sammy's fingers...
...often making the kitchen look like a CSI crime scene...
...notice our dishwasher...
...we were married for 13 years without one!
...they are often victimized by Sammy's fingers...
...often making the kitchen look like a CSI crime scene...
...notice our dishwasher...
...we were married for 13 years without one!

Through that doorway is the dining room...
...most of this wall will be gone soon...
...most of this wall will be gone soon...

No longer will we be able to have a table in the kitchen...
...this will host the refrigerator and the wall oven...
...this will host the refrigerator and the wall oven...

Through this doorway from the dining room is the kitchen...
...the red line shows where the wall will be cut out...
...the red line shows where the wall will be cut out...

Saturday, August 11, 2007
Color my world...
As we prepare to begin our kitchen remodel, painting choices come up again. Perhaps we might be able to switch to a Martha Stewart color scheme.
Previously, we had gone with a simple interior color theme we picked up at Sherwin Williams, called, "Streamlined Years." Admittedly, the era of the color theme is older than our 1959 house. When the day comes to sell the house, most likely we'll paint everything in sight beige...yuck.
All the wood trim in of our house is painted bright white. Accents or main colors of some of our rooms are:

Previously, we had gone with a simple interior color theme we picked up at Sherwin Williams, called, "Streamlined Years." Admittedly, the era of the color theme is older than our 1959 house. When the day comes to sell the house, most likely we'll paint everything in sight beige...yuck.
All the wood trim in of our house is painted bright white. Accents or main colors of some of our rooms are:
- Our master bedroom - Cascade Green (SW 0066)
- The study - Copen Blue (SW 0068)
- The living room - Porcelain (SW 0053)
- Hallways/Stairways - Porcelain (SW 0053) (still not finished yet!)
- Dining room - Porcelain (SW 0053) below the chair rail, Copen Blue (SW 0068) above
- Basement - we broke and went with Sherwin Williams Friendly Yellow (SW 6680) which is reasonably close to the Streamlined Color theme of Belvedere Cream (SW 0067)

Monday, August 06, 2007
2003 Basement Remodel
After posting pictures of the house taken when we just bought it, it occurred that it might be a good time to recall our basement remodel and the lessons we learned from it. When we moved in, our basement had 1/2 of it finished (approximately 14x30 feet). For windows there were two small single rows of 4 glass blocks each which let in very little light. The paneling was dark. The carpet was hideous. And the tiled ceiling was terrible. So when the time came, we remodeled the finished portion.

We established the following criteria for our basement remodel...we needed/wanted:

Since we had a large picture window which sides were almost centered on where we wanted the egress windows cut, we decided to employ a structural engineer. The trusses go from the front of the house to the rear, so the front and rear foundations carry much of the house's weight. The weight directly over the large picture window is displaced to the sides. The structural engineer had some good ideas (enlarge structural engineer the images below). The cost was a few hundred dollars but it was worth every penny.


We found a young local contractor who gave us a great price and was willing to work with all our stipulations, such as:
Construction was a fun thing to watch. It took almost 6 weeks (in retrospect we're not sure why). We did learn one important lesson, never dry cut cinder-blocks!
The only surviving picture of the ugly basement that was...
...notice the small window of four glass blocks and how little light it allowed in...
...notice the small window of four glass blocks and how little light it allowed in...

We established the following criteria for our basement remodel...we needed/wanted:
- to be able to afford it
- to allow in much more light...in the end we wanted two 4'x'4 egress windows
- the windows to meet egress conditions (meet inspection)
- a tiled or Pergo floor
An exterior view of a Bilco ScapeWEL...
Since we had a large picture window which sides were almost centered on where we wanted the egress windows cut, we decided to employ a structural engineer. The trusses go from the front of the house to the rear, so the front and rear foundations carry much of the house's weight. The weight directly over the large picture window is displaced to the sides. The structural engineer had some good ideas (enlarge structural engineer the images below). The cost was a few hundred dollars but it was worth every penny.
Simple diagram of weight being displaced into where egress windows would go...

Page 1 of 3 from the structural engineer...

Page 2 of 3 from structural engineer...

Page 3 of 3 from structural engineer...

We found a young local contractor who gave us a great price and was willing to work with all our stipulations, such as:
- full compliance with the structural engineer's specifications
- full compliance with manufacturer's specifications
- no subcontractors without our approval
- no substitution of materials without our approval
- no work would start until permits had been obtained
- windows to be inspected and approved by the city for egress
- sufficient dirt would be over the footing to prevent heaving of the foundation during winter
Construction was a fun thing to watch. It took almost 6 weeks (in retrospect we're not sure why). We did learn one important lesson, never dry cut cinder-blocks!
A video Paul Made some time ago of our almost finished basement...
Subscribe to:
Posts (Atom)